Tutorial 02
Import config
The app has no nodes of its own. You write in a subscription, QR code, or manual parameters from your provider. This tutorial covers the three common methods on the official UI, and where rule files live.
1. Start add from Home
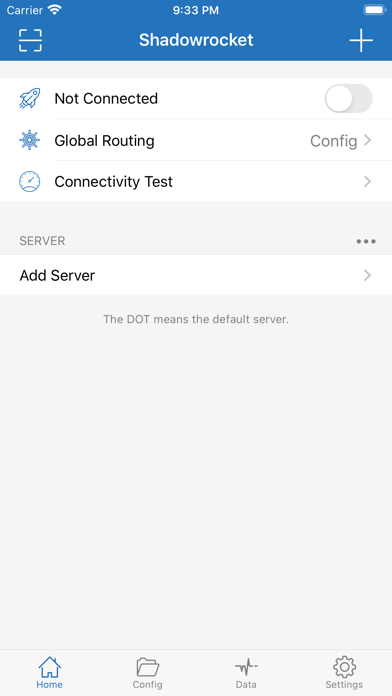
Use any of these entries:
- Tap + at the top right. Use this when you already know which Type to pick.
- Tap Add Server. This opens a blank server form first.
- Scan icon at the top left: if you have a QR code, scan it here. You do not have to pick Type first.
Providers usually give one of these: a subscription URL, a QR code, or a host / port / password. This site does not provide that material. Without it, the form can only stay empty.
2. Pick the right Type first
On the add page, the first field is Type. Opening it shows the protocol list. A subscription and a single node are not the same Type. The wrong Type makes fields mismatch.
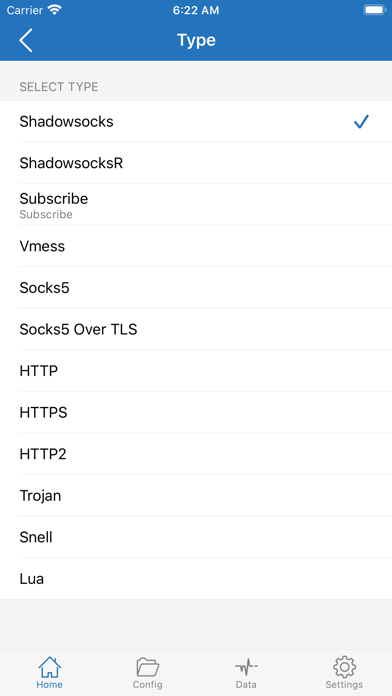
- If you have a long
http(s)://subscription URL, choose Subscribe. - If you have a QR code, scan it on Home, or pick the matching protocol in Type and use Scan QR Code.
- If you have host, port, and password, pick the protocol they wrote—for example Shadowsocks, Vmess, Trojan, Socks5, or HTTP.
- The check on Shadowsocks in the screenshot is only a sample default. You do not have to pick it.
3. Import with a subscription URL
After Type is Subscribe, the form is mostly a URL. Paste the full link from your provider. Do not strip the query string after the question mark.
- URL: paste the subscription address. A link cut by a space or line break is the most common import failure.
- Remark: optional. Name this subscription, for example “Work” or the provider’s name.
- Tap Done at the top right to save. Back on Home, SERVER should show a batch of nodes, not only Add Server.
- Pulling down the list on Home updates this subscription. It does not refresh the current connection. An update does not automatically change the node you already selected.
4. Add one node by hand
Use this only when you know every parameter. A missing or wrong field can still let the switch turn on, but access will fail.
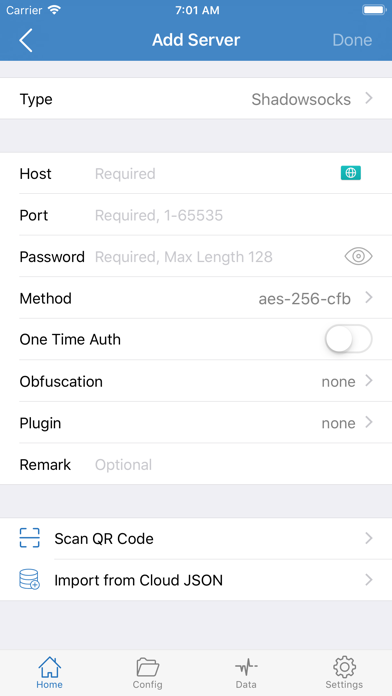
- Type: match the protocol they gave you.
- Host / Port: address and port. Port range 1–65535.
- Password or UUID: fill in as the protocol requires. Tap the eye icon to check for extra spaces.
- Method: cipher. The screenshot shows aes-256-cfb. Follow their docs. Do not guess a common value.
- Remark: optional label. It only appears in the list and does not affect the connection.
- Scan QR Code at the bottom fills the current form from a single-node code. Import from Cloud JSON imports from cloud JSON and most people will not need it.
- When you are done, tap Done.
5. Do not change Plugin without a reason
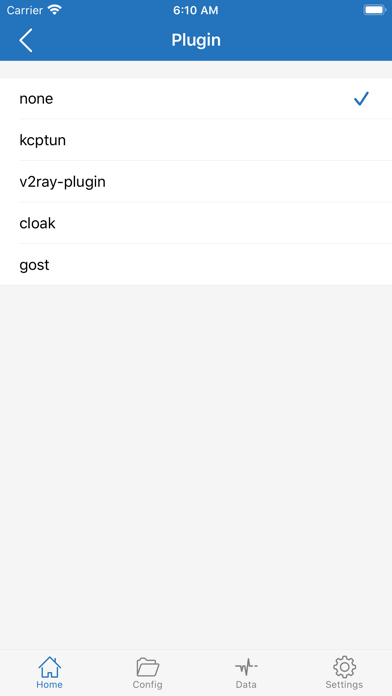
Some Shadowsocks nodes require a plugin such as v2ray-plugin or kcptun. Change this only when they wrote it down. A wrong plugin looks a lot like a wrong password: the switch is on, pages do not load.
6. Rule files are in Config, not the Home list
SERVER on Home is nodes. Routing rules, Hosts, and URL Rewrite are in the Config tab at the bottom. Some subscriptions also deliver a rule file. Others deliver only nodes, and rules stay on the bundled default.conf.
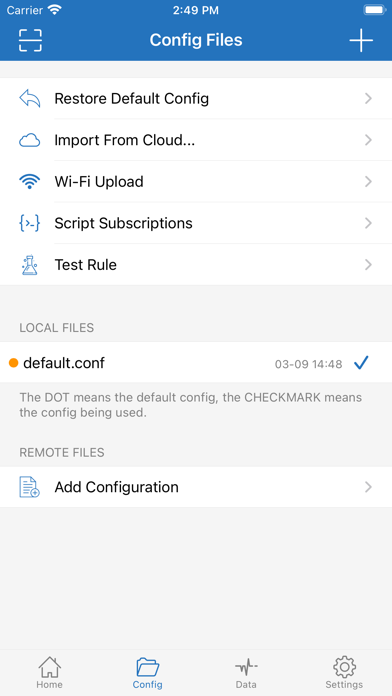
- LOCAL FILES are rule files on the device. In the screenshot,
default.confhas both a dot and a check mark, so it is the default and the current file. - Add Configuration under REMOTE FILES adds a remote rule URL. That is not the same as Subscribe on Home.
- At the top you can restore the default config, import from the cloud, upload over Wi-Fi, or manage script subscriptions.
- Do not edit the hundred-plus rules in default.conf as a beginner. Import a node and get a working connection first, then talk about rules.